Dear Readers,
In this article we will see How to install Oracle software and creation of database. on RAC Environment .

Please check the below link :
How to install Oracle software on RAC Environment
To Install Oracle software we need download Oracle binaries for oracle.com
otherwise below link to download
File 1
https://drive.google.com/open?id=1B7zdsW-mAygSgfB6m1p4vyz3W_WyPIjG
File 2
https://drive.google.com/open?id=1dQLrvBFwy_tb0tEBb4B9veVi0KMQcN_B
After downloading copy the files into RAC1 Node and unzip the binaries
It will create database directory
Goto database directory and run ./runInstaller file

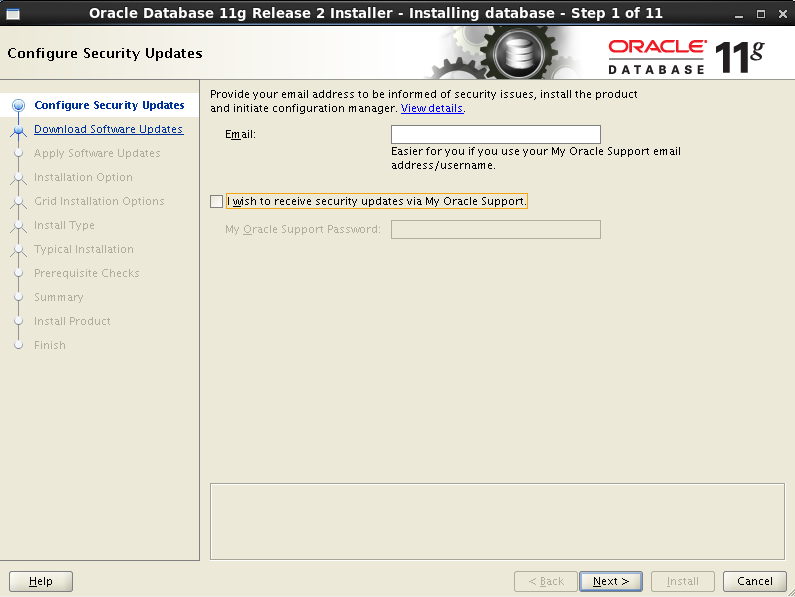
Unclick on Oracle support
Click on Next
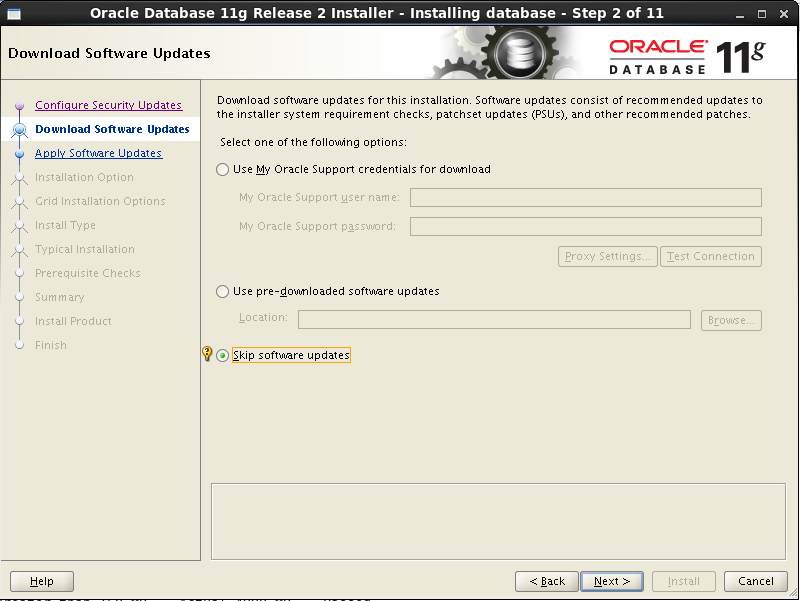
select Skip software updates
Click on Next
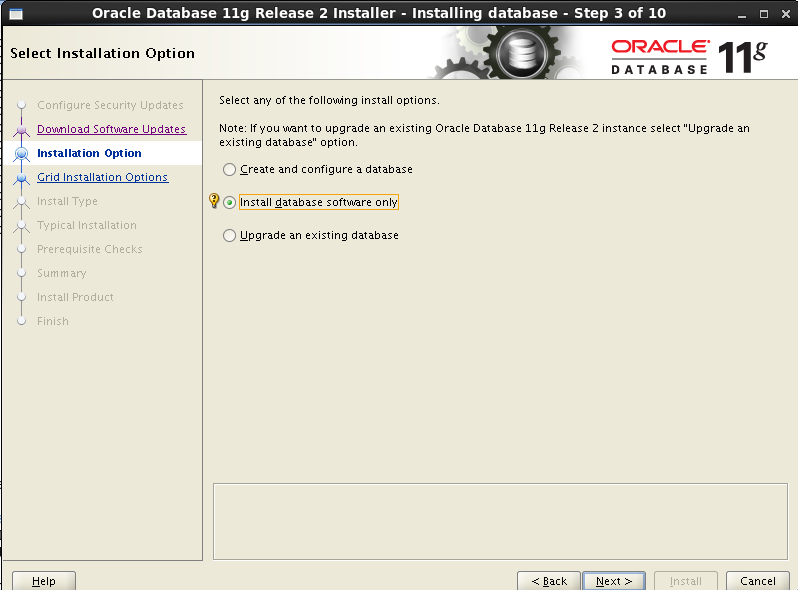
Choose Install database software only
Click on Next
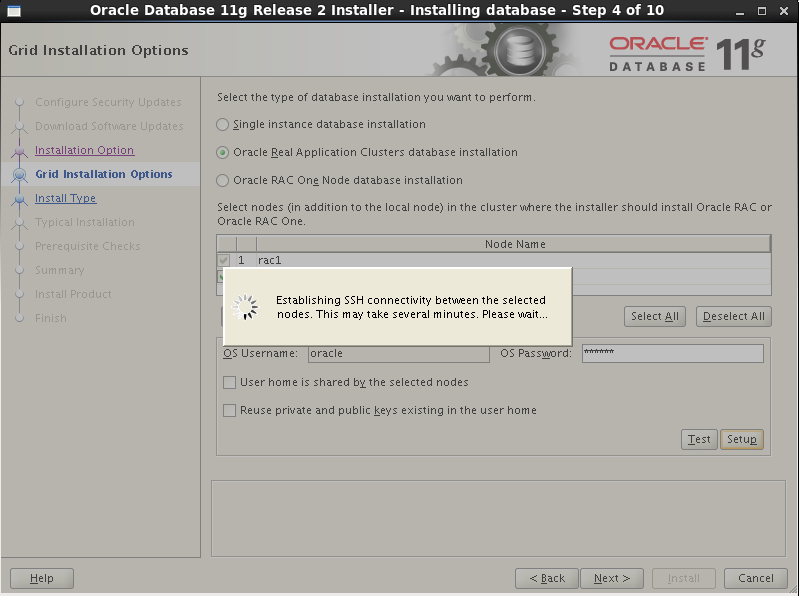
Choose Real Application Cluster database installation
SSH connectivity should setup
Click on Next
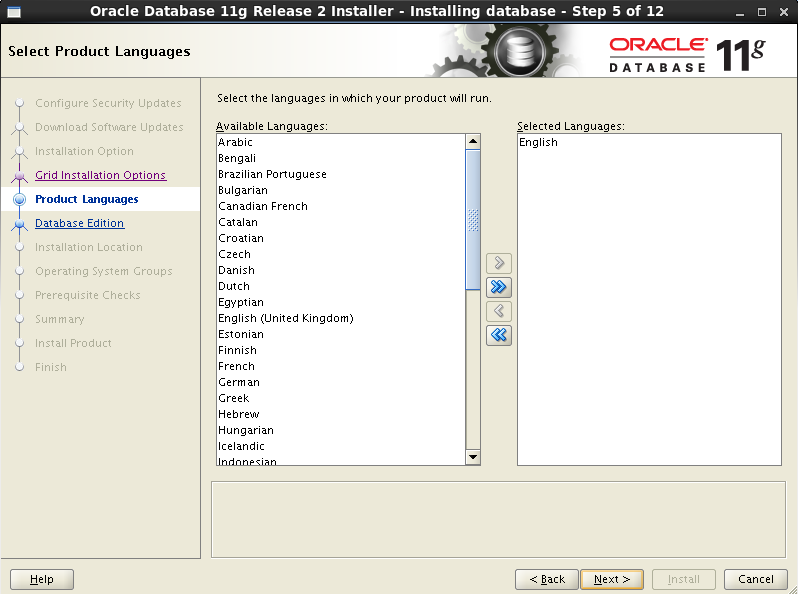
Select English Language
Click on Next
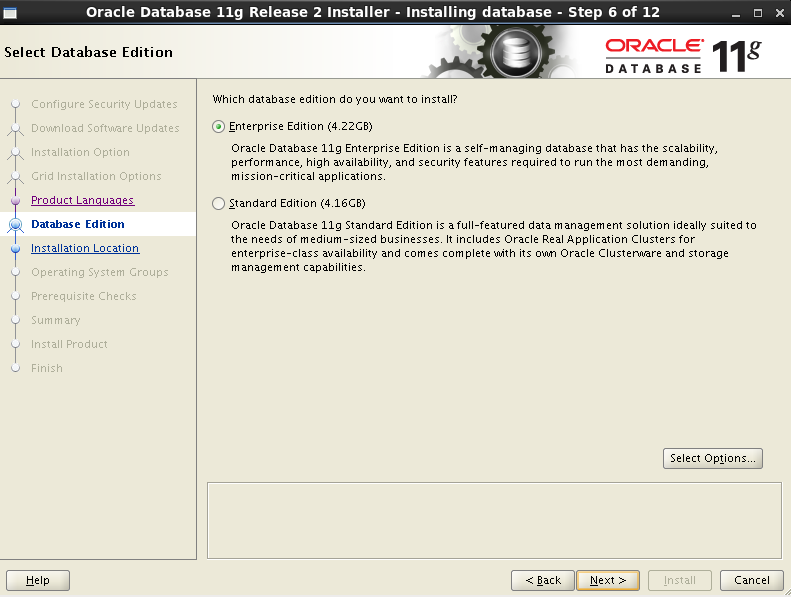
Choose Enterprise Edition
Click on Next
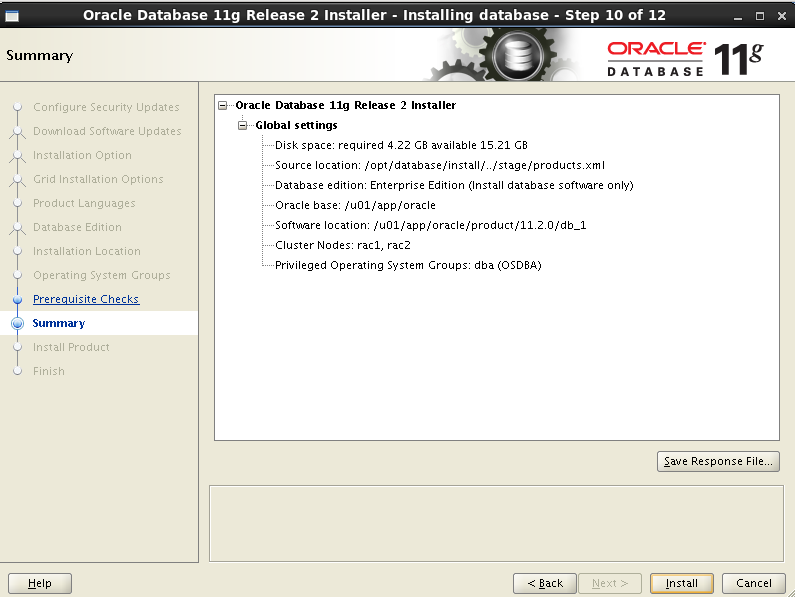
Specify Oracle Base and Software location
Click on Next

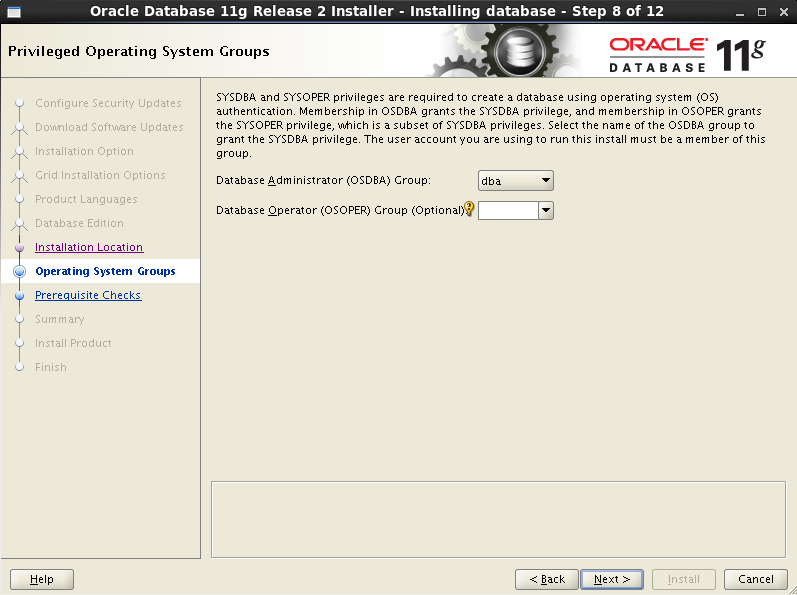
Group will be selected as DBA
Click on Next
Click on install
Installation process will be started
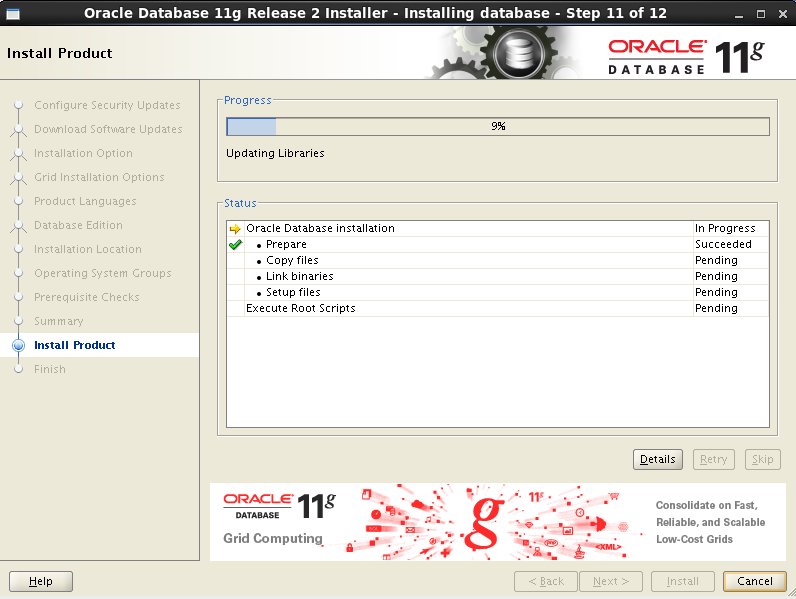
Automatically binaries will be copied from RAC1 to RAC2 node.

Run the Root scripts as Root user from both the nodes (RAC1& RAC2).
|
1 2 3 4 5 6 7 8 9 10 11 12 13 14 15 16 17 18 19 |
[oracle@RAC1 ~]$ su - Password: [root@RAC1 ~]# /u01/app/oracle/product/11.2.0/db_1/root.sh Performing root user operation for Oracle 11g The following environment variables are set as: ORACLE_OWNER= oracle ORACLE_HOME= /u01/app/oracle/product/11.2.0/db_1 Enter the full pathname of the local bin directory: [/usr/local/bin]: The contents of "dbhome" have not changed. No need to overwrite. The contents of "oraenv" have not changed. No need to overwrite. The contents of "coraenv" have not changed. No need to overwrite. Entries will be added to the /etc/oratab file as needed by Database Configuration Assistant when a database is created Finished running generic part of root script. Now product-specific root actions will be performed. Finished product-specific root actions. |
From RAC2
|
1 2 3 4 5 6 7 8 9 10 11 12 13 14 15 16 17 18 19 |
[oracle@RAC2 ~]$ su - Password: [root@RAC2 ~]# /u01/app/oracle/product/11.2.0/db_1/root.sh Performing root user operation for Oracle 11g The following environment variables are set as: ORACLE_OWNER= oracle ORACLE_HOME= /u01/app/oracle/product/11.2.0/db_1 Enter the full pathname of the local bin directory: [/usr/local/bin]: The contents of "dbhome" have not changed. No need to overwrite. The contents of "oraenv" have not changed. No need to overwrite. The contents of "coraenv" have not changed. No need to overwrite. Entries will be added to the /etc/oratab file as needed by Database Configuration Assistant when a database is created Finished running generic part of root script. Now product-specific root actions will be performed. Finished product-specific root actions. |
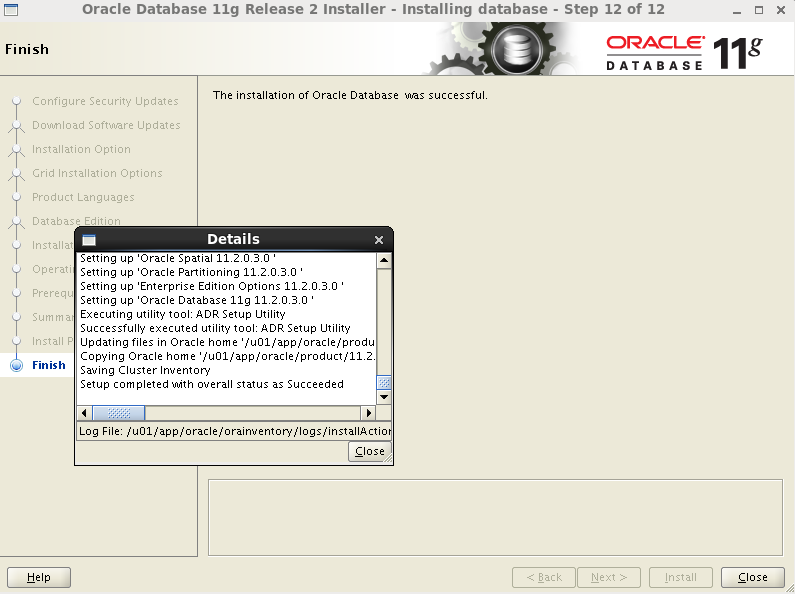
Finally Oracle Software was successfully installed
Create diskgroups in ASM for database :
Create two disk groups DATA and FRA connecting to ASM instance.
|
1 2 3 4 5 6 7 8 9 10 11 12 13 14 |
[oracle@RAC1 ~]$ . oraenv ORACLE_SID = [oracle] ? +ASM1 The Oracle base has been set to /u01/app/oracle [oracle@RAC1 ~]$ sqlplus / as sysasm SQL*Plus: Release 11.2.0.3.0 Production on Wed May 22 19:00:04 2019 Copyright (c) 1982, 2011, Oracle. All rights reserved. Connected to: Oracle Database 11g Enterprise Edition Release 11.2.0.3.0 - Production With the Real Application Clusters and Automatic Storage Management options SQL>> |
|
1 2 3 4 5 6 |
SQL> create diskgroup DATA external redundancy disk 'ORCL:DATA1','ORCL:DATA2'; Diskgroup created. SQL> create diskgroup FRA external redundancy disk 'ORCL:FRA1','ORCL:FRA2'; Diskgroup created. |
Now check diskgroups
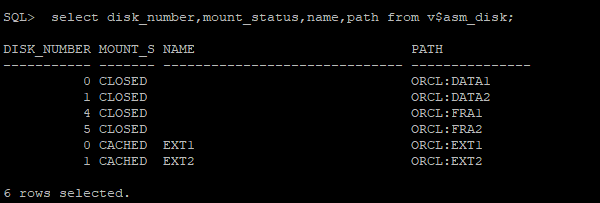
By default DATA and FRA will be Dismounted
Now we need mount Both DATA and FRA diskgroups

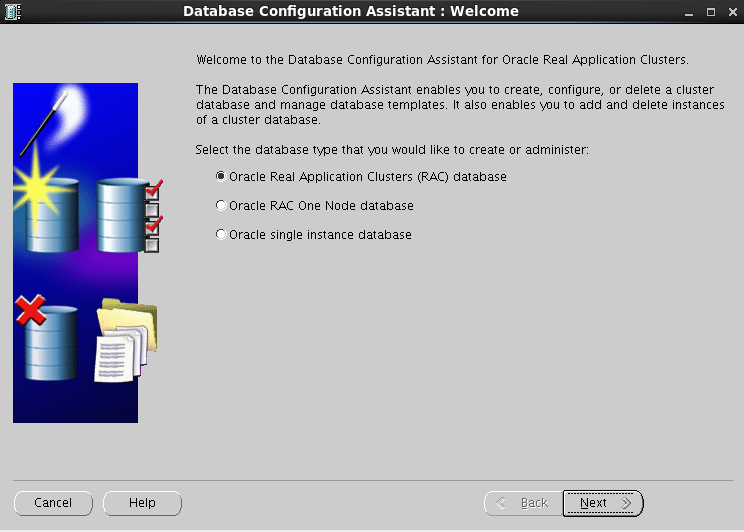
Now create database using DBCA
Goto ORACLE_HOME/bin location
then run ./dbca

Select Oracle Real Application Cluster database
Click on Next
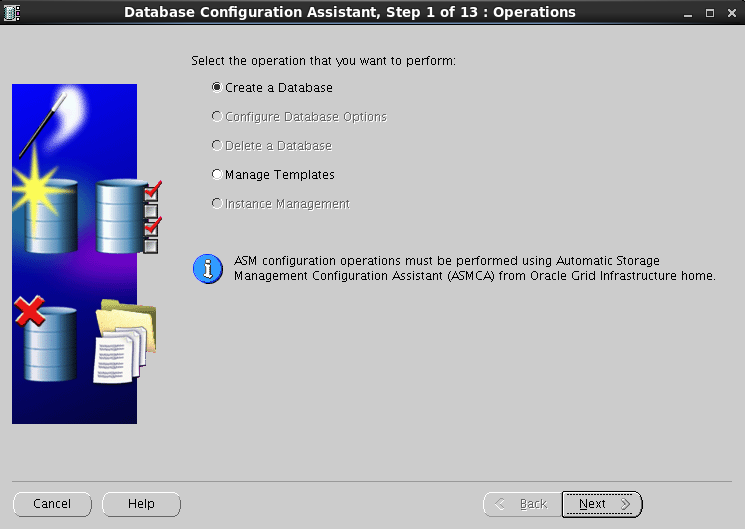
Choose Create database
Click on Next
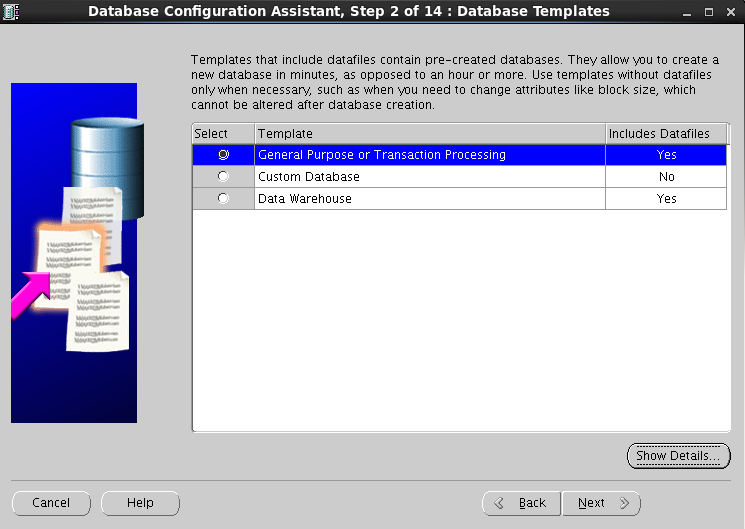
Choose General purpose or Transaction Processing
Click on Next
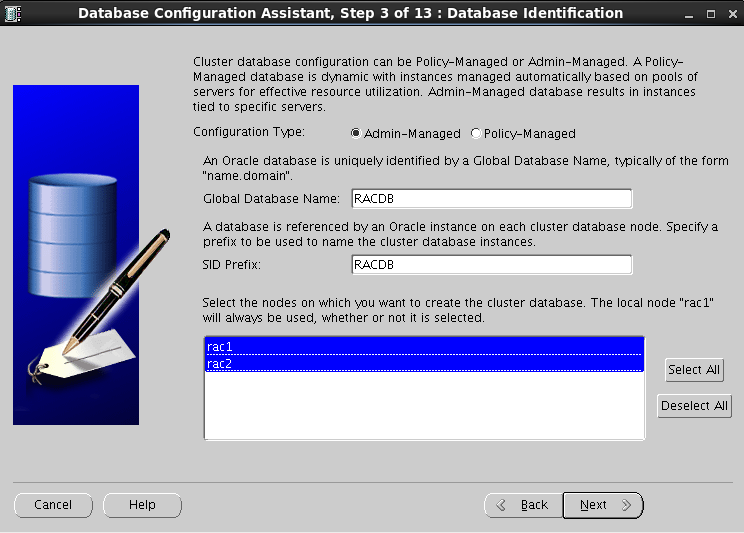
Choose ADMIN-MANAGED
Provide SID name Global Database Name
Click on Next
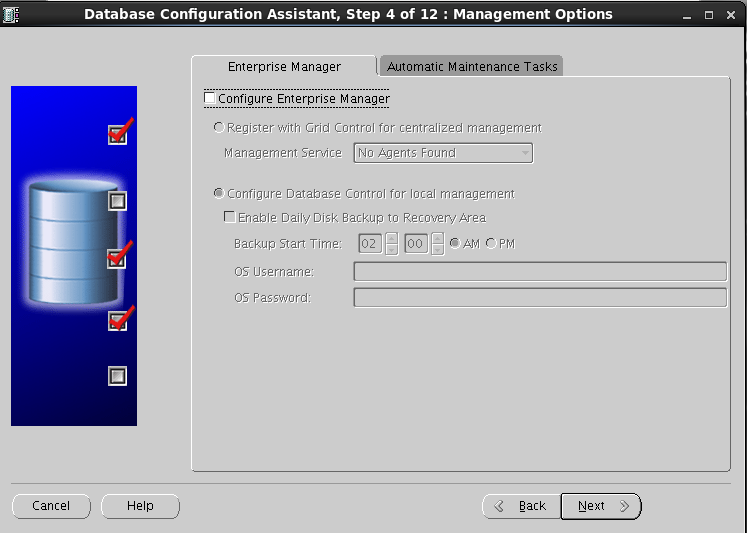
If you want to configure EM then select
other wise unselect EM
Click on Next
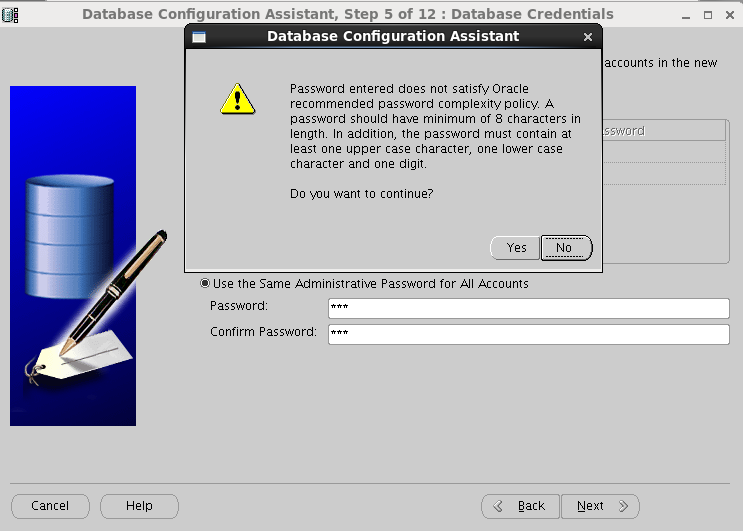
Provide SYS and SYSTEM user passwords
Click on Next
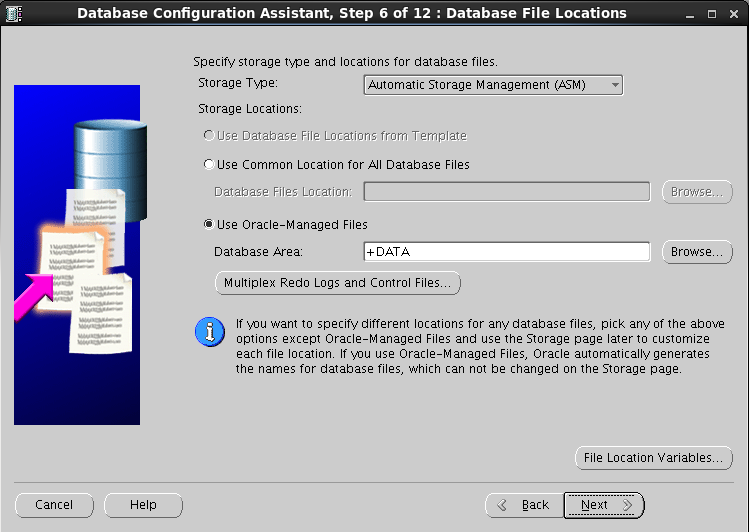
Choose OMF database type and mention DIskgroup name (DATA1)
Click on Next
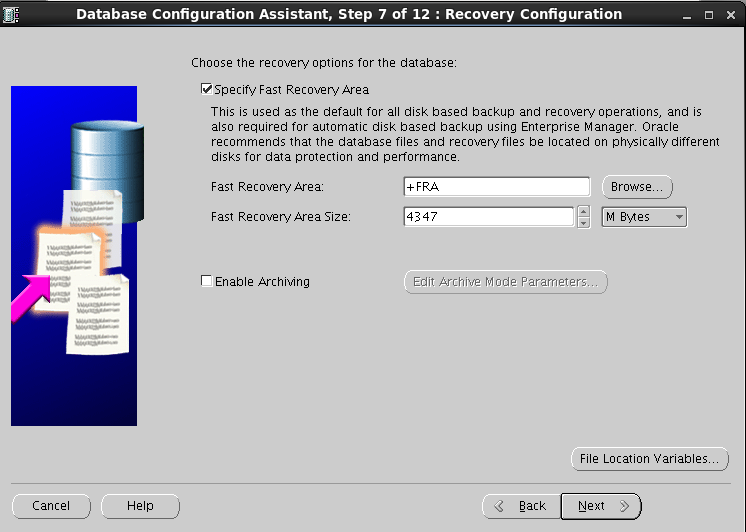
Click on FRA and if you want to enable Archive log mode the chose Enable Archiving
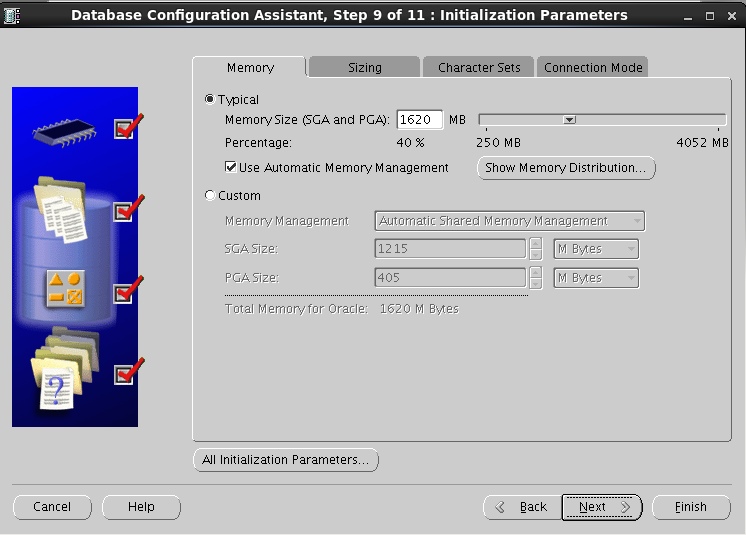
Modify Memory settings as per you configuration
Click on Next
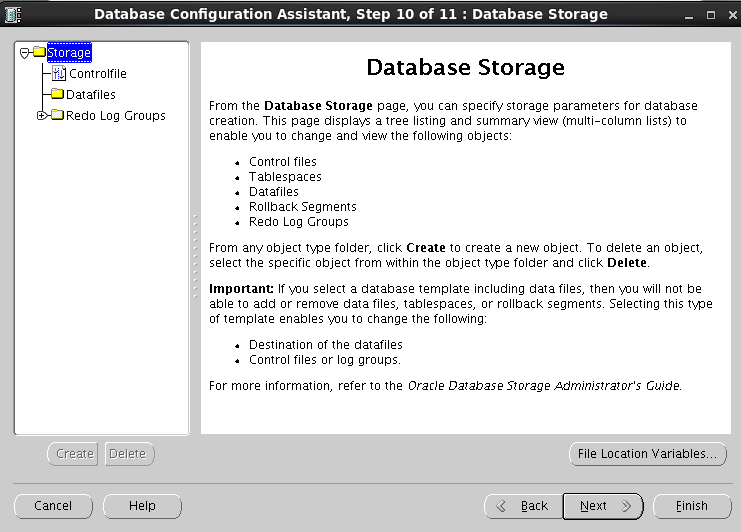
Verify storage locations and files then click next
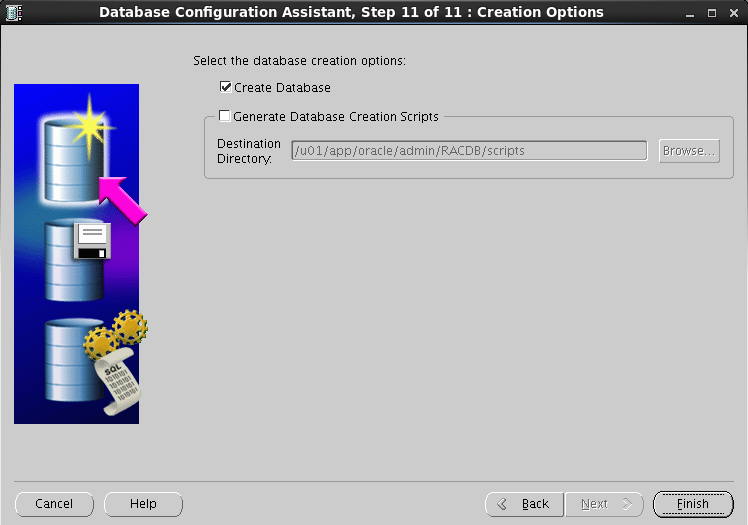
Click on Finish
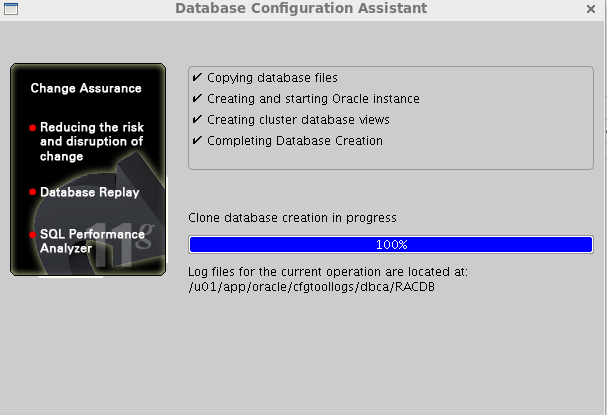
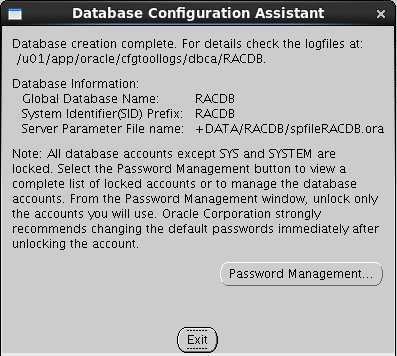
Database creation will be started

Verify the DBNAME,SID and SPfile location and
Click on Exit
Now check database started on both servers or not (On both the nodes)
|
1 |
ps -ef | grep smon |
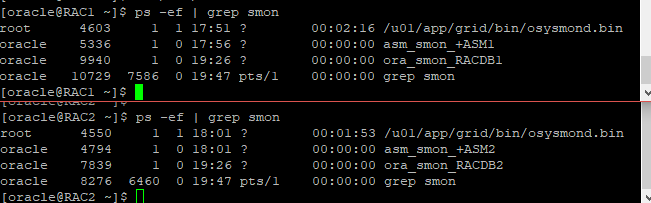
Check instance information

Instance started Successfully
Thank you for giving your valuable time to read the above information. Please click here to subscribe for further updates
KTEXPERTS is always active on below social media platforms.
Facebook : https://www.facebook.com/ktexperts/
LinkedIn : https://www.linkedin.com/company/ktexperts/
Twitter : https://twitter.com/ktexpertsadmin
YouTube : https://www.youtube.com/c/ktexperts