Dear Readers,
In this article,we will see Basic Linux Commands for DevOps.

First, we need to AWS Console page by using below link.
https://aws.amazon.com/console/
Click on sign in to Console button.

Logging to aws account
Login using username & password and click on sign in.
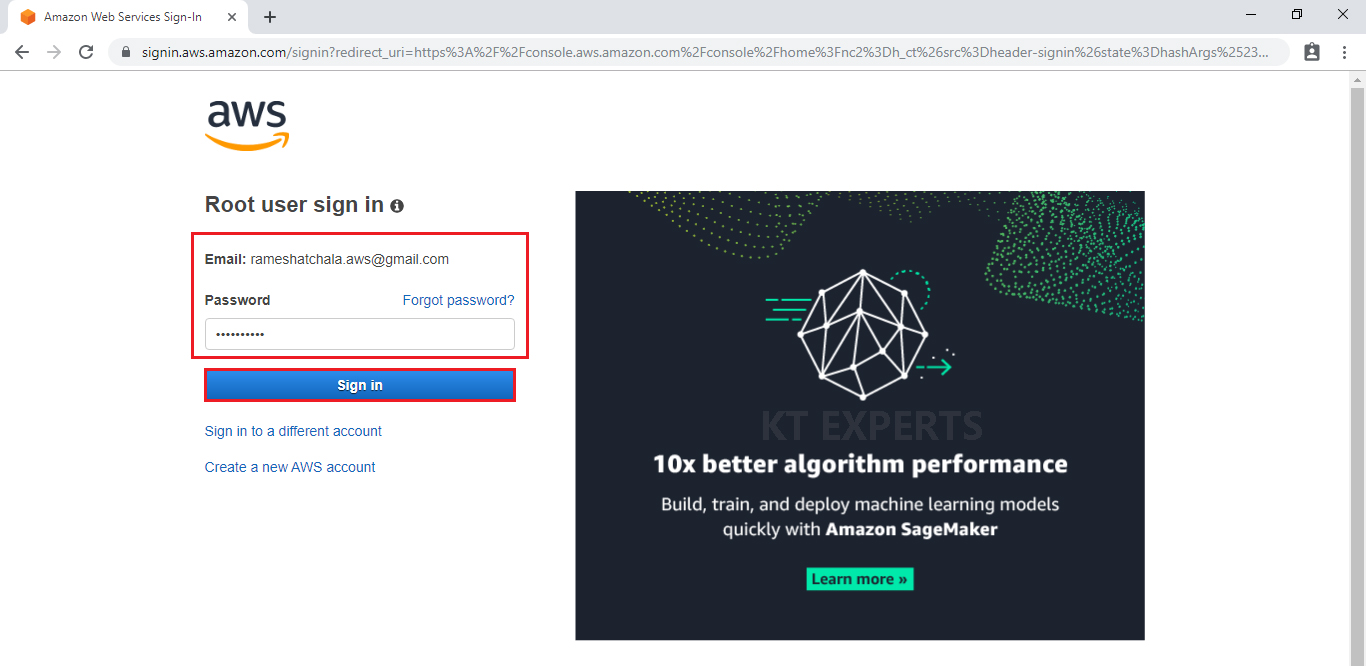
Enter to AWS Management Console
We can see the AWS Management Console Dashboard.
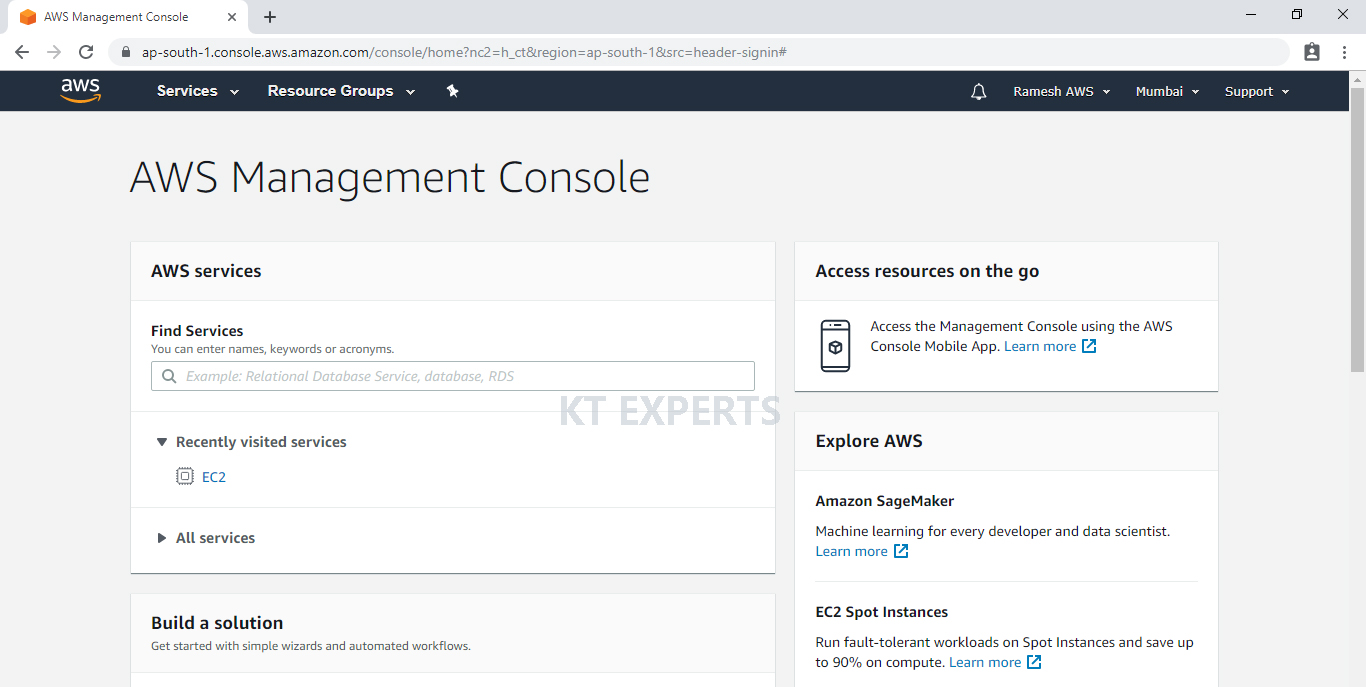
Go to Services, under the compute module click EC2 service to open.

Launch Linux EC2 Instance
Please check below link to Launch Linux Server.
Launch Linux Launch Linux Server
We can see Linux Server “My Linux” which was created earlier.
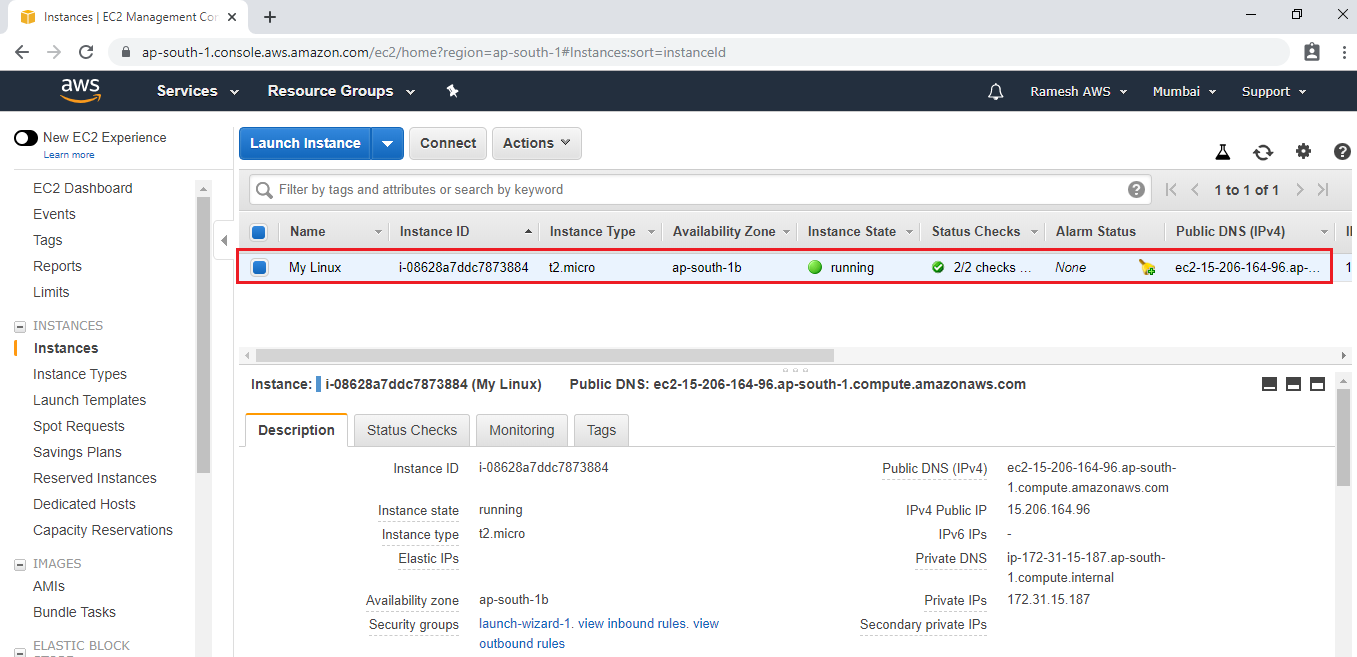
Connect to Linux Server through putty.
Open Linux Server terminal,.
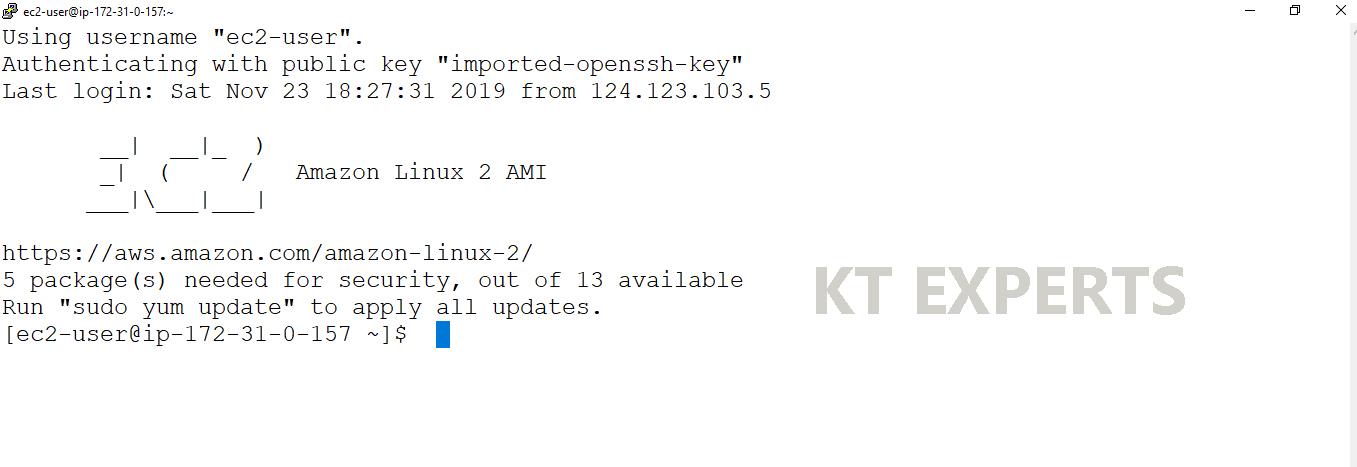
Open Linux Terminal
|
1 2 3 4 5 6 7 8 9 10 |
Using username "ec2-user". Authenticating with public key "imported-openssh-key" Last login: Sat Nov 30 22:25:06 2019 from 123.201.165.3 __| __|_ ) _| ( / Amazon Linux 2 AMI ___|\___|___| https://aws.amazon.com/amazon-linux-2/ [ec2-user@ip-172-31-43-80 ~]$ |
Switch to root user
|
1 2 |
[ec2-user@ip-172-31-43-80 ~]$ sudo su [root@ip-172-31-43-80 ec2-user]# |
Install server Updates
|
1 2 3 4 5 6 7 8 9 10 11 12 13 14 15 16 17 18 19 20 21 22 23 24 25 26 27 28 29 30 31 32 33 34 35 36 37 38 39 40 41 42 43 44 45 46 47 48 49 50 51 52 53 54 55 56 57 58 59 60 61 |
[root@ip-172-31-43-80 ec2-user]# yum update -y Loaded plugins: extras_suggestions, langpacks, priorities, update-motd amzn2-core | 2.4 kB 00:00 Resolving Dependencies --> Running transaction check ---> Package file.x86_64 0:5.11-33.amzn2.0.2 will be updated ---> Package python-libs.x86_64 0:2.7.16-3.amzn2.0.1 will be updated ---> Package python-libs.x86_64 0:2.7.16-4.amzn2 will be an update ---> Package rsyslog.x86_64 0:8.24.0-41.amzn2.2.1 will be an update ---> Package yum.noarch 0:3.4.3-158.amzn2.0.2 will be updated ---> Package yum.noarch 0:3.4.3-158.amzn2.0.3 will be an update --> Finished Dependency Resolution Dependencies Resolved ================================================================================ Package Arch Version Repository Size ================================================================================ Installing: kernel x86_64 4.14.154-128.181.amzn2 amzn2-core 20 M yum noarch 3.4.3-158.amzn2.0.3 amzn2-core 1.2 M Transaction Summary ================================================================================ Install 2 Packages Upgrade 11 Packages Total download size: 32 M Downloading packages: Delta RPMs disabled because /usr/bin/applydeltarpm not installed. (1/13): file-5.11-35.amzn2.0.1.x86_64.rpm | 57 kB 00:00 (2/13): file-libs-5.11-35.amzn2.0.1.x86_64.rpm | 339 kB 00:00 (3/13): python-2.7.16-4.amzn2.x86_64.rpm | 92 kB 00:00 (4/13): python-devel-2.7.16-4.amzn2.x86_64.rpm | 403 kB 00:00 -------------------------------------------------------------------------------- Total 56 MB/s | 32 MB 00:00 Running transaction check Running transaction test Transaction test succeeded Running transaction Updating : rpm-4.11.3-40.amzn2.0.3.x86_64 1/25 Installing : python2-rpm-4.11.3-40.amzn2.0.3.x86_64 7/25 Verifying : file-5.11-35.amzn2.0.1.x86_64 2/25 Verifying : rsyslog-8.24.0-16.amzn2.6.1.x86_64 24/25 Verifying : file-libs-5.11-33.amzn2.0.2.x86_64 25/25 Installed: kernel.x86_64 0:4.14.154-128.181.amzn2 python2-rpm.x86_64 0:4.11.3-40.amzn2.0.3 Updated: file.x86_64 0:5.11-35.amzn2.0.1 file-libs.x86_64 0:5.11-35.amzn2.0.1 python.x86_64 0:2.7.16-4.amzn2 python-devel.x86_64 0:2.7.16-4.amzn2 python-libs.x86_64 0:2.7.16-4.amzn2 rpm.x86_64 0:4.11.3-40.amzn2.0.3 rpm-build-libs.x86_64 0:4.11.3-40.amzn2.0.3 rpm-libs.x86_64 0:4.11.3-40.amzn2.0.3 rpm-plugin-systemd-inhibit.x86_64 0:4.11.3-40.amzn2.0.3 rsyslog.x86_64 0:8.24.0-41.amzn2.2.1 yum.noarch 0:3.4.3-158.amzn2.0.3 Replaced: rpm-python.x86_64 0:4.11.3-25.amzn2.0.3 Complete! |
Create Files and Directories
cat
we can create files by using cat command.
Create a new file “ktexperts1”
Note
Press ctrl+d to quit.
|
1 2 |
[root@ip-172-31-43-80 ec2-user]# cat > ktexperts1 ktexperts is a knowledge sharing platform!! |
To display the content of the file
|
1 2 |
[root@ip-172-31-43-80 ec2-user]# cat ktexperts1 ktexperts is a knowledge sharing platform! |
Add content to an existing file “ktexperts1”
|
1 2 |
[root@ip-172-31-43-80 ec2-user]# cat >> ktexperts1 It will help you to get knowledge!! |
To display the content of the file
|
1 2 3 |
[root@ip-172-31-43-80 ec2-user]# cat ktexperts1 ktexperts is a knowledge sharing platform! It will help to get knowledge!! |
touch
we can create empty files by using touch command.
Create a empty file “ktexperts2”
|
1 |
[root@ip-172-31-43-80 ec2-user]# touch ktexperts2 |
To see list of files
|
1 2 |
[root@ip-172-31-43-80 ec2-user]# ls ktexperts1 ktexperts2 |
Creating multiple empty files
|
1 |
[root@ip-172-31-43-80 ec2-user]# touch a b c d e |
To see list of files in the current directory
|
1 2 |
[root@ip-172-31-43-80 ec2-user]# ls a b c d e ktexperts1 ktexperts2 |
nano
We can create and edit files using nano command.
Edit a existing file “ktexperts2”
Note
press ctrl + x and Y to quit.
|
1 |
[root@ip-172-31-43-80 ec2-user]# nano ktexperts2 |
To see list of files in the current directory
|
1 2 |
[root@ip-172-31-43-80 ec2-user]# ls a b c d e ktexperts1 ktexperts2 |
vi/vim
We can create files using vi/vim command.
Create a new file “ktexperts3”
Note : Press esc and wq! then enter to quit.
|
1 |
[root@ip-172-31-43-80 ec2-user]# vi ktexperts3 |
To see list of files in the current directory
|
1 2 |
[root@ip-172-31-43-80 ec2-user]# ls a b c d e ktexperts1 ktexperts2 ktexperts3 |
tree
tree is a recursive directory listing program that produces a depth-indented listing of files.
tree lists all the files and/or directories.
tree returns the total number of files and/or directories listed.
Install tree Package
By default the tree command is not installed. Type following command to install tree command
|
1 2 3 4 5 6 7 8 9 10 11 12 13 14 15 16 17 18 19 20 21 22 23 24 25 26 27 28 29 30 31 |
[root@ip-172-31-43-80 ec2-user]# yum install tree -y Loaded plugins: extras_suggestions, langpacks, priorities, update-motd Resolving Dependencies --> Running transaction check ---> Package tree.x86_64 0:1.6.0-10.amzn2.0.1 will be installed --> Finished Dependency Resolution Dependencies Resolved ================================================================================================ Package Arch Version Repository Size ================================================================================================ Installing: tree x86_64 1.6.0-10.amzn2.0.1 amzn2-core 47 k Transaction Summary ================================================================================================ Install 1 Package Total download size: 47 k Installed size: 83 k Downloading packages: tree-1.6.0-10.amzn2.0.1.x86_64.rpm | 47 kB 00:00:00 Running transaction Installing : tree-1.6.0-10.amzn2.0.1.x86_64 1/1 Verifying : tree-1.6.0-10.amzn2.0.1.x86_64 1/1 Installed: tree.x86_64 0:1.6.0-10.amzn2.0.1 Complete! |
To see list files in tree format
|
1 2 3 4 5 6 7 8 9 10 |
[root@ip-172-31-43-80 ec2-user]# tree . ├── a ├── b ├── c ├── d ├── e ├── ktexperts1 ├── ktexperts2 └── ktexperts3 |
Create a Directory
mkdir
We can create a directory using mkdir Command.
Create a new directory “ktexperts”
|
1 2 3 |
[root@ip-172-31-43-80 ec2-user]# mkdir ktexperts [root@ip-172-31-43-80 ec2-user]# ls a b c d e ktexperts ktexperts1 ktexperts2 ktexperts3 |
Create Multiple Directories
|
1 2 3 4 5 6 7 8 9 10 11 12 13 14 15 16 17 |
root@ip-172-31-43-80 ec2-user]# mkdir a b c d e [root@ip-172-31-43-80 ec2-user]# ls a b c d dir1 dir2 dir3 e ktexperts1 ktexperts2 ktexperts3 [root@ip-172-31-43-80 ec2-user]# tree . ├── a ├── b ├── c ├── d ├── dir1 ├── dir2 ├── dir3 ├── e ├── ktexperts1 ├── ktexperts2 └── ktexperts3 |
Create multiple directories inside a directory.
|
1 2 3 |
[root@ip-172-31-43-80 ec2-user]# mkdir -p dir1/dir1a/dir1b [root@ip-172-31-43-80 ec2-user]# ls a b c d dir1 dir2 dir3 e ktexperts1 ktexperts2 ktexperts3 |
Verify Directories
Bu using cd command we can go inside/change another directory.
cd change directory
Go forward step by step
|
1 2 3 4 5 6 7 8 |
[root@ip-172-31-43-80 ec2-user]# cd dir1 [root@ip-172-31-43-80 dir1]# ls dir1a [root@ip-172-31-43-80 dir1]# cd dir1a [root@ip-172-31-43-80 dir1a]# ls dir1b [root@ip-172-31-43-80 dir1a]# cd dir1b [root@ip-172-31-43-80 dir1b]# ls |
pwd
It prints the path of the working directory, starting from the root.
pwd – print working directory
|
1 2 |
[root@ip-172-31-43-80 dir1b]# pwd /home/ec2-user/dir1/dir1a/dir1b |
Go backward step by step
|
1 2 3 4 5 6 7 8 9 10 |
[root@ip-172-31-43-80 dir1b]# cd .. [root@ip-172-31-43-80 dir1a]# ls dir1b [root@ip-172-31-43-80 dir1a]# cd .. [root@ip-172-31-43-80 dir1]# ls dir1a [root@ip-172-31-43-80 dir1]# cd .. [root@ip-172-31-43-80 ec2-user]# ls a b c d dir1 dir2 dir3 e ktexperts1 ktexperts2 ktexperts3 [root@ip-172-31-43-80 ec2-user]# |
Go forward directly
|
1 2 3 4 |
[root@ip-172-31-43-80 ec2-user]# cd dir1/dir1a/dir1b/ [root@ip-172-31-43-80 dir1b]# ls [root@ip-172-31-43-80 dir1b]# pwd /home/ec2-user/dir1/dir1a/dir1b |
Go backward directly
|
1 2 3 4 5 6 7 8 9 10 11 12 13 14 15 16 17 18 19 20 21 22 |
[root@ip-172-31-43-80 dir1b]# cd ../../.. [root@ip-172-31-43-80 ec2-user]# pwd /home/ec2-user [root@ip-172-31-43-80 ec2-user]# ls a b c d dir1 dir2 dir3 e ktexperts1 ktexperts2 ktexperts3 [root@ip-172-31-43-80 ec2-user]# tree . ├── a ├── b ├── c ├── d ├── dir1 │ └── dir1a │ └── dir1b ├── dir2 ├── dir3 ├── e ├── ktexperts1 ├── ktexperts2 └── ktexperts3 5 directories, 8 files |
ls
The ls command is a command-line utility for listing the contents of a directory or directories.
|
1 2 |
[root@ip-172-31-43-80 ec2-user]# ls a b c d dir1 dir2 dir3 e ktexperts1 ktexperts2 ktexperts3 |
To see long list of files and directories
ls -l
It will show size, modified date and time, file or folder name and owner of file and its permission.
|
1 2 3 4 5 6 7 8 9 10 11 12 13 |
[root@ip-172-31-43-80 ec2-user]# ls -l total 4 -rw-r--r-- 1 root root 0 Dec 11 05:02 a -rw-r--r-- 1 root root 0 Dec 11 05:02 b -rw-r--r-- 1 root root 0 Dec 11 05:02 c -rw-r--r-- 1 root root 0 Dec 11 05:02 d drwxr-xr-x 3 root root 19 Dec 11 05:21 dir1 drwxr-xr-x 2 root root 6 Dec 11 05:19 dir2 drwxr-xr-x 2 root root 6 Dec 11 05:19 dir3 -rw-r--r-- 1 root root 0 Dec 11 05:02 e -rw-r--r-- 1 root root 75 Dec 11 05:04 ktexperts1 -rw-r--r-- 1 root root 0 Dec 11 05:05 ktexperts2 -rw-r--r-- 1 root root 0 Dec 11 05:05 ktexperts3 |
Create a hidden file
|
1 2 3 4 |
[root@ip-172-31-43-80 ec2-user]# cat > .ktexperts4 www.ktexperts.com [root@ip-172-31-43-80 ec2-user]# ls a b c d dir1 dir2 dir3 e ktexperts1 ktexperts2 ktexperts3 |
To see all files and directories including hidden files
[root@ip-172-31-43-80 ec2-user]# ls -a
|
1 2 |
. a .bash_history .bash_profile c dir1 dir3 ktexperts1 ktexperts3 .ssh .. b .bash_logout .bashrc d dir2 e ktexperts2 .ktexperts4 |
To see long list of all files and directories including hidden files
|
1 2 3 4 5 6 7 8 9 10 11 12 13 14 15 16 17 18 19 20 21 |
[root@ip-172-31-43-80 ec2-user]# ls -la total 24 drwx------ 6 ec2-user ec2-user 249 Dec 11 05:19 . drwxr-xr-x 4 root root 36 Dec 10 13:06 .. -rw-r--r-- 1 root root 0 Dec 11 05:02 a -rw-r--r-- 1 root root 0 Dec 11 05:02 b -rw------- 1 ec2-user ec2-user 16 Nov 30 22:28 .bash_history -rw-r--r-- 1 ec2-user ec2-user 18 Jul 27 2018 .bash_logout -rw-r--r-- 1 ec2-user ec2-user 193 Jul 27 2018 .bash_profile -rw-r--r-- 1 ec2-user ec2-user 231 Jul 27 2018 .bashrc -rw-r--r-- 1 root root 0 Dec 11 05:02 c -rw-r--r-- 1 root root 0 Dec 11 05:02 d drwxr-xr-x 3 root root 19 Dec 11 05:21 dir1 drwxr-xr-x 2 root root 6 Dec 11 05:19 dir2 drwxr-xr-x 2 root root 6 Dec 11 05:19 dir3 -rw-r--r-- 1 root root 0 Dec 11 05:02 e -rw-r--r-- 1 root root 75 Dec 11 05:04 ktexperts1 -rw-r--r-- 1 root root 0 Dec 11 05:05 ktexperts2 -rw-r--r-- 1 root root 0 Dec 11 05:05 ktexperts3 -rw-r--r-- 1 root root 10 Dec 11 05:23 .ktexperts4 drwx------ 2 ec2-user ec2-user 29 Nov 30 15:47 .ssh |
Copy
Create a new file
|
1 2 3 4 5 6 7 8 9 10 11 12 13 14 15 16 17 18 19 20 21 22 23 |
[root@ip-172-31-43-80 ec2-user]# cat > file My website is www.ktexperts.com [root@ip-172-31-43-80 ec2-user]# cat file My website is www.ktexperts.com [root@ip-172-31-43-80 ec2-user]# tree . ├── a ├── b ├── c ├── d ├── dir1 │ └── dir1a │ └── dir1b ├── dir2 ├── dir3 ├── e ├── file ├── ktexperts ├── ktexperts1 ├── ktexperts2 └── ktexperts3 6 directories, 9 files |
Copy file to directory
|
1 2 3 4 5 6 7 8 9 10 11 12 13 14 15 16 17 18 19 20 21 22 23 |
[root@ip-172-31-43-80 ec2-user]# cp file ktexperts [root@ip-172-31-43-80 ec2-user]# ls a b c d dir1 dir2 dir3 e file ktexperts ktexperts1 ktexperts2 ktexperts3 [root@ip-172-31-43-80 ec2-user]# tree . ├── a ├── b ├── c ├── d ├── dir1 │ └── dir1a │ └── dir1b ├── dir2 ├── dir3 ├── e ├── file ├── ktexperts │ └── file ├── ktexperts1 ├── ktexperts2 └── ktexperts3 6 directories, 10 files |
Go inside directory and verify the file
|
1 2 3 4 5 6 |
[root@ip-172-31-43-80 ec2-user]# cd ktexperts [root@ip-172-31-43-80 ktexperts]# ls file [root@ip-172-31-43-80 ktexperts]#cd .. [root@ip-172-31-43-80 ec2-user]# a b c d dir1 dir2 dir3 e file ktexperts ktexperts1 ktexperts2 ktexperts3 |
Move
Move file to directory
|
1 2 3 4 5 6 7 8 9 10 11 12 13 14 15 16 17 18 19 20 21 22 23 |
[root@ip-172-31-43-80 ec2-user]# mv ktexperts1 ktexperts [root@ip-172-31-43-80 ec2-user]# ls a b c d dir1 dir2 dir3 e file ktexperts ktexperts2 ktexperts3 [root@ip-172-31-43-80 ec2-user]# tree . ├── a ├── b ├── c ├── d ├── dir1 │ └── dir1a │ └── dir1b ├── dir2 ├── dir3 ├── e ├── file ├── ktexperts │ ├── file │ └── ktexperts1 ├── ktexperts2 └── ktexperts3 6 directories, 10 files |
Move multiple files to one directory
|
1 2 3 4 5 6 7 8 9 10 11 12 13 14 15 16 17 18 19 20 21 |
[root@ip-172-31-43-80 ec2-user]# mv ktexperts2 ktexperts3 ktexperts [root@ip-172-31-43-80 ec2-user]# ls a b c d dir1 dir2 dir3 e file ktexperts [root@ip-172-31-43-80 ec2-user]# tree . ├── a ├── b ├── c ├── d ├── dir1 │ └── dir1a │ └── dir1b ├── dir2 ├── dir3 ├── e ├── file └── ktexperts ├── file ├── ktexperts1 ├── ktexperts2 └── ktexperts3 |
Go inside directory and verify the files
|
1 2 3 4 5 6 7 8 9 10 11 |
[root@ip-172-31-43-80 ec2-user]# cd ktexperts/ [root@ip-172-31-43-80 ktexperts]# ls file ktexperts1 ktexperts2 ktexperts3 [root@ip-172-31-43-80 ktexperts]# tree . ├── file ├── ktexperts1 ├── ktexperts2 └── ktexperts3 0 directories, 4 files |
Rename
Rename an existing file
|
1 2 3 4 5 6 7 |
[root@ip-172-31-43-80 ec2-user]# cat file My website is www.ktexperts.com [root@ip-172-31-43-80 ec2-user]# mv file newfile [root@ip-172-31-43-80 ec2-user]# ls a b c d dir1 dir2 dir3 e ktexperts newfile [root@ip-172-31-43-80 ec2-user]# cat newfile My website is www.ktexperts.com |
Remove
Using rm command
Remove a single directory
|
1 2 3 |
[root@ip-172-31-43-80 ec2-user]# rm -rf dir1 [root@ip-172-31-43-80 ec2-user]# ls a b c d dir2 dir3 e ktexperts newfile |
Remove all files and directories
|
1 2 3 |
[root@ip-172-31-43-80 ec2-user]# rm -rf * [root@ip-172-31-43-80 ec2-user]# ls [root@ip-172-31-43-80 ec2-user]# |
grep
The grep command which stands for “global regular expression print”.
By default, grep displays the matching lines.
Use grep to search for lines of text that match one or many regular expressions, and outputs only the matching lines.
Using grep for search files.
grep is a powerful file pattern searcher in Linux.
To see the list of users
|
1 2 3 4 5 6 7 8 9 10 11 12 13 14 15 16 17 18 19 20 21 22 23 24 25 26 |
[root@ip-172-31-43-80 ec2-user]# cat /etc/passwd root:x:0:0:root:/root:/bin/bash bin:x:1:1:bin:/bin:/sbin/nologin daemon:x:2:2:daemon:/sbin:/sbin/nologin adm:x:3:4:adm:/var/adm:/sbin/nologin lp:x:4:7:lp:/var/spool/lpd:/sbin/nologin sync:x:5:0:sync:/sbin:/bin/sync shutdown:x:6:0:shutdown:/sbin:/sbin/shutdown halt:x:7:0:halt:/sbin:/sbin/halt mail:x:8:12:mail:/var/spool/mail:/sbin/nologin operator:x:11:0:operator:/root:/sbin/nologin games:x:12:100:games:/usr/games:/sbin/nologin ftp:x:14:50:FTP User:/var/ftp:/sbin/nologin nobody:x:99:99:Nobody:/:/sbin/nologin systemd-network:x:192:192:systemd Network Management:/:/sbin/nologin dbus:x:81:81:System message bus:/:/sbin/nologin rpc:x:32:32:Rpcbind Daemon:/var/lib/rpcbind:/sbin/nologin libstoragemgmt:x:999:997:daemon account for libstoragemgmt:/var/run/lsm:/sbin/nologin sshd:x:74:74:Privilege-separated SSH:/var/empty/sshd:/sbin/nologin rpcuser:x:29:29:RPC Service User:/var/lib/nfs:/sbin/nologin nfsnobody:x:65534:65534:Anonymous NFS User:/var/lib/nfs:/sbin/nologin ec2-instance-connect:x:998:996::/home/ec2-instance-connect:/sbin/nologin postfix:x:89:89::/var/spool/postfix:/sbin/nologin chrony:x:997:995::/var/lib/chrony:/sbin/nologin tcpdump:x:72:72::/:/sbin/nologin ec2-user:x:1000:1000:EC2 Default User:/home/ec2-user:/bin/bash |
To search /etc/passwd file for the user “ec2-user”.
|
1 2 |
[root@ip-172-31-43-80 ec2-user]# grep ec2-user /etc/passwd ec2-user:x:1000:1000:EC2 Default User:/home/ec2-user:/bin/bash |
To search /etc/passwd file for the user “root”.
|
1 2 3 |
[root@ip-172-31-43-80 ec2-user]# grep root /etc/passwd root:x:0:0:root:/root:/bin/bash operator:x:11:0:operator:/root:/sbin/nologin |
less
The less command is used to see the output line wise or page wise.
Note
press Enter key to scroll down line by line.
Use d to go to next page.
Use b to go to previous page.
Use / to search for a word in the file.
Use v to go vi mode where you can edit the file and once you save it you will back to less command.
press q to quit from the prompt.
|
1 2 3 4 5 6 7 8 9 10 11 12 13 14 15 16 17 18 19 20 21 22 23 24 25 26 27 |
[root@ip-172-31-43-80 ec2-user]# less /etc/passwd root:x:0:0:root:/root:/bin/bash bin:x:1:1:bin:/bin:/sbin/nologin daemon:x:2:2:daemon:/sbin:/sbin/nologin adm:x:3:4:adm:/var/adm:/sbin/nologin lp:x:4:7:lp:/var/spool/lpd:/sbin/nologin sync:x:5:0:sync:/sbin:/bin/sync shutdown:x:6:0:shutdown:/sbin:/sbin/shutdown halt:x:7:0:halt:/sbin:/sbin/halt mail:x:8:12:mail:/var/spool/mail:/sbin/nologin operator:x:11:0:operator:/root:/sbin/nologin games:x:12:100:games:/usr/games:/sbin/nologin ftp:x:14:50:FTP User:/var/ftp:/sbin/nologin nobody:x:99:99:Nobody:/:/sbin/nologin systemd-network:x:192:192:systemd Network Management:/:/sbin/nologin dbus:x:81:81:System message bus:/:/sbin/nologin rpc:x:32:32:Rpcbind Daemon:/var/lib/rpcbind:/sbin/nologin libstoragemgmt:x:999:997:daemon account for libstoragemgmt:/var/run/lsm:/sbin/nologin sshd:x:74:74:Privilege-separated SSH:/var/empty/sshd:/sbin/nologin rpcuser:x:29:29:RPC Service User:/var/lib/nfs:/sbin/nologin nfsnobody:x:65534:65534:Anonymous NFS User:/var/lib/nfs:/sbin/nologin ec2-instance-connect:x:998:996::/home/ec2-instance-connect:/sbin/nologin postfix:x:89:89::/var/spool/postfix:/sbin/nologin chrony:x:997:995::/var/lib/chrony:/sbin/nologin tcpdump:x:72:72::/:/sbin/nologin ec2-user:x:1000:1000:EC2 Default User:/home/ec2-user:/bin/bash /etc/passwd (END) |
.more
The less command is used to see the output line wise or page wise.
Note
press Enter key to scroll down line by line.
Use d to go to next page.
Use b to go to previous page.
Use / to search for a word in the file.
Use v to go vi mode where you can edit the file and once you save it you will back to more command.
press q to quit from the prompt.
|
1 2 3 4 5 6 7 8 9 10 11 12 13 14 15 16 17 18 19 20 21 22 23 24 25 26 |
[root@ip-172-31-43-80 ec2-user]# more /etc/passwd root:x:0:0:root:/root:/bin/bash bin:x:1:1:bin:/bin:/sbin/nologin daemon:x:2:2:daemon:/sbin:/sbin/nologin adm:x:3:4:adm:/var/adm:/sbin/nologin lp:x:4:7:lp:/var/spool/lpd:/sbin/nologin sync:x:5:0:sync:/sbin:/bin/sync shutdown:x:6:0:shutdown:/sbin:/sbin/shutdown halt:x:7:0:halt:/sbin:/sbin/halt mail:x:8:12:mail:/var/spool/mail:/sbin/nologin operator:x:11:0:operator:/root:/sbin/nologin games:x:12:100:games:/usr/games:/sbin/nologin ftp:x:14:50:FTP User:/var/ftp:/sbin/nologin nobody:x:99:99:Nobody:/:/sbin/nologin systemd-network:x:192:192:systemd Network Management:/:/sbin/nologin dbus:x:81:81:System message bus:/:/sbin/nologin rpc:x:32:32:Rpcbind Daemon:/var/lib/rpcbind:/sbin/nologin libstoragemgmt:x:999:997:daemon account for libstoragemgmt:/var/run/lsm:/sbin/nologin sshd:x:74:74:Privilege-separated SSH:/var/empty/sshd:/sbin/nologin rpcuser:x:29:29:RPC Service User:/var/lib/nfs:/sbin/nologin nfsnobody:x:65534:65534:Anonymous NFS User:/var/lib/nfs:/sbin/nologin ec2-instance-connect:x:998:996::/home/ec2-instance-connect:/sbin/nologin postfix:x:89:89::/var/spool/postfix:/sbin/nologin chrony:x:997:995::/var/lib/chrony:/sbin/nologin tcpdump:x:72:72::/:/sbin/nologin ec2-user:x:1000:1000:EC2 Default User:/home/ec2-user:/bin/bash |
head
It is used to display the top 10 lines of the file.
By default it will top 10 lines.
To see top 10 lines of the file
|
1 2 3 4 5 6 7 8 9 10 11 |
[root@ip-172-31-43-80 ec2-user]# head /etc/passwd root:x:0:0:root:/root:/bin/bash bin:x:1:1:bin:/bin:/sbin/nologin daemon:x:2:2:daemon:/sbin:/sbin/nologin adm:x:3:4:adm:/var/adm:/sbin/nologin lp:x:4:7:lp:/var/spool/lpd:/sbin/nologin sync:x:5:0:sync:/sbin:/bin/sync shutdown:x:6:0:shutdown:/sbin:/sbin/shutdown halt:x:7:0:halt:/sbin:/sbin/halt mail:x:8:12:mail:/var/spool/mail:/sbin/nologin operator:x:11:0:operator:/root:/sbin/nologin |
To see top 5 lines of the file
|
1 2 3 4 5 6 |
[root@ip-172-31-43-80 ec2-user]# head -5 /etc/passwd root:x:0:0:root:/root:/bin/bash bin:x:1:1:bin:/bin:/sbin/nologin daemon:x:2:2:daemon:/sbin:/sbin/nologin adm:x:3:4:adm:/var/adm:/sbin/nologin lp:x:4:7:lp:/var/spool/lpd:/sbin/nologin |
tail
It is used to display the last 10 lines of the file
To see last 10 lines of the file
|
1 2 3 4 5 6 7 8 9 10 11 |
[root@ip-172-31-43-80 ec2-user]# tail /etc/passwd rpc:x:32:32:Rpcbind Daemon:/var/lib/rpcbind:/sbin/nologin libstoragemgmt:x:999:997:daemon account for libstoragemgmt:/var/run/lsm:/sbin/nologin sshd:x:74:74:Privilege-separated SSH:/var/empty/sshd:/sbin/nologin rpcuser:x:29:29:RPC Service User:/var/lib/nfs:/sbin/nologin nfsnobody:x:65534:65534:Anonymous NFS User:/var/lib/nfs:/sbin/nologin ec2-instance-connect:x:998:996::/home/ec2-instance-connect:/sbin/nologin postfix:x:89:89::/var/spool/postfix:/sbin/nologin chrony:x:997:995::/var/lib/chrony:/sbin/nologin tcpdump:x:72:72::/:/sbin/nologin ec2-user:x:1000:1000:EC2 Default User:/home/ec2-user:/bin/bash |
To see last 5 lines of the file
|
1 2 3 4 5 6 |
[root@ip-172-31-43-80 ec2-user]# tail -5 /etc/passwd ec2-instance-connect:x:998:996::/home/ec2-instance-connect:/sbin/nologin postfix:x:89:89::/var/spool/postfix:/sbin/nologin chrony:x:997:995::/var/lib/chrony:/sbin/nologin tcpdump:x:72:72::/:/sbin/nologin ec2-user:x:1000:1000:EC2 Default User:/home/ec2-user:/bin/bash |
sort
It is used to sort the output in numeric or alphabetic order.
Create a new file “Ram”
|
1 2 3 4 5 6 7 8 9 10 11 12 13 14 15 16 17 18 19 20 21 22 |
[root@ip-172-31-43-80 ec2-user]# cat > Ram Ram Hanuman Lakshman Sitha Ravan Bharat Surpanaka Vali Sugreeva [root@ip-172-31-43-80 ec2-user]#ls Ram Hanuman Lakshman Sitha Ravan Bharat Surpanaka Vali Sugreeva |
Sorting in Alphabetical order
|
1 2 3 4 5 6 7 8 9 10 |
[root@ip-172-31-43-80 ec2-user]# sort Ram Bharat Hanuman Lakshman Ram Ravan Sitha Sugreeva Surpanaka Vali |
Thank you for giving your valuable time to read the above information. Please click here to subscribe for further updates
KTEXPERTS is always active on below social media platforms.
Facebook: https://www.facebook.com/ktexperts/
LinkedIn : https://www.linkedin.com/company/ktexperts/
Twitter : https://twitter.com/ktexpertsadmin
YouTube : https://www.youtube.com/c/ktexperts
Instagram : https://www.instagram.com/knowledgesharingplatform
Follow Me
Ramesh’s Linkedin : Ramesh Atchala



Priya
Very interesting and thnqq for creating this…
santhi
It’s awesome Ramesh…whenever i have any doubt i always prefer this site.