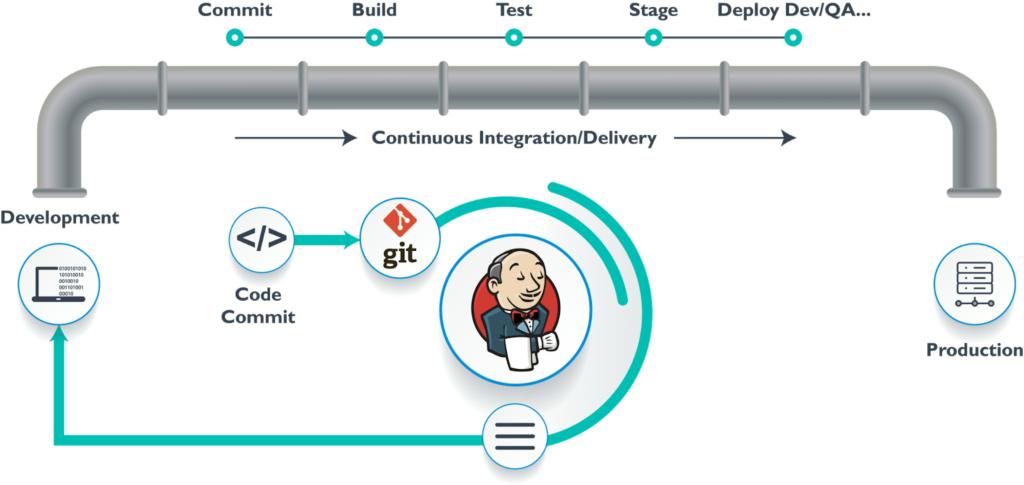
Jenkins pipeline job to trigger commands/scripts based on time in Oracle DB server.

▪️ This job triggers the commands/scripts based on time (as Oracle user) in Oracle DB server (Jenkins Slave server)
▪️ This job will trigger the job similar to CRONJOB in Unix machine.
What is Jenkins pipeline?
▪️ A Pipeline is a collection of occasions interlinked with every difference in a sequence.
▪️ Jenkins Pipeline (or simply “Pipeline” with a capital “P”) is a series of events or tasks performed in a specific sequence to transform the code from version control into a stable software product by employing a suite of plugins in Jenkins.
▪️ Thus, enabling the implementation and integration of Continuous Delivery processes within Jenkins
▪️ Jenkins Pipeline is a mixture of plugins that helps the combination and implementation of non-stop transport pipelines. It has an extensible automation server to create easy and complicated transport pipelines as code through pipeline DSL.
Why Pipelines?
▪️ Jenkins is a free, open-source continuous integration server with the capacity to help software development process automation.
▪️ With the aid of use cases, you may design numerous automation jobs and run them through a Jenkins pipeline.
Jenkins pipeline is recommended for the following reasons:
▪️ Jenkins pipeline is developed using code, allowing numerous people to change and run the pipeline process.
▪️ The pipeline will thus be immediately resumed if your server has to restart for some reason.
▪️ The pipeline process can be stopped, and you can instruct it to not restart until the user provides input.
▪️ Jenkins Pipelines assist with large projects. It’s possible to use pipelines in a loop and perform numerous jobs.
System configuration details:
Jenkins Master server |
Mac machine |
Jenkins Slave server (Agent machine) |
Oracle Linux server |
Jenkins pipeline script type |
Declarative pipeline |
Jenkins slave OS user to run commands. |
Oracle user |
Jenkins slave OS user connection type |
SSH key based connection |
Jenkins trigger job frequency |
Every one minute (1 minute) |
👉 Step 1: Open a new item in Jenkins console to create a job.
▪️ Go to Dashboard in the Jenkins console.
▪️ Open a new item in the left side pane of the Jenkins console.

👉 Step 2: Provide the job name and select pipeline option and click OK.
▪️ Enter the name of the Job to be created.
▪️ Select the Pipeline project option and click ok.
👉 Step 3: Provide the configuration details for the Trigger job.
▪️ Provide the description of the job, in the General section of the configuration tab.
▪️ Select the Pipeline project option and click ok.
👉 Step 4: Write the pipeline code under Pipeline section and save.
▪️ Enter the display name under advanced option.
▪️ Write the code in the Pipeline script section.
▪️ Then click the save button to save the pipeline job.
Note: The Cron command below in this screenshot will run every minute for all 7 days /every day in the week.
👉 Step 5: Click the Build Now option to run/test the job for first time.
▪️ Click the Build now option in the Jenkins console.
▪️ Then check for the execution status with #number which should turn GREEN for success of the job.
👉 Step 6: We can observe the job completion is successful as GREEN.
▪️ Click the number# on the left side of the pane in the Jenkins console which should turn GREEN.
▪️ Check for the time the job got executed in the Stage view.
▪️ Also check for the elapse time of the job to complete in the same Stage view.
👉 Step 7: Check the console output of this job.
▪️ Click the console output of the corresponding job.
▪️ Check for output of each command which got executed.
▪️ Also check for the SUCCESS key word at the end of the console output
👉 Step 8: Check the build trigger section that get updated automatically for future RUNS.
▪️ We will observe after successful execution of the job, the build periodically section gets updated with Schedule (under section Build Triggers)
▪️ We can see that the same time schedule gets reflected as mentioned in the pipeline script.
▪️ Based on this Build periodically entry (time schedule), the job gets fired/executed for the next run.
👉 Step 9: Check that the next RUN of the job triggered automatically.
▪️ Check for the next run of the pipeline job as per the time schedule.
▪️ The job should kick of exactly the time mentioned in the corn entry of the script.
▪️ We can observe each successful execution and time of execution through stage view.
▪️ The stage view also displays the elapse time of the job.
👉 Step 10: Check the last success/failure time of this job in Dashboard.
▪️ We can check the last success and failure status of the pipeline job in the Dashboard.
▪️ The Dashboard also shows the status of the job (Either success or failure).
Author : Venkat Vinod Kumar Siram
LinkedIn : https://www.linkedin.com/in/vinodsiram/
Assisted by Shanmugavel
Thank you for giving your valuable time to read the above information. Please click here to subscribe for further updates.
KTExperts is always active on social media platforms.
Facebook : https://www.facebook.com/ktexperts
LinkedIn : https://www.linkedin.com/company/ktexperts/
Twitter : https://twitter.com/ktexpertsadmin
YouTube : https://www.youtube.com/c/ktexperts
Instagram : https://www.instagram.com/knowledgesharingplatform
Note: Please test scripts in Non Prod before trying in Production.


